I have been meaning to replace the default artwork that comes with the Razer Panthera Evo arcade stick.
I spent a lot of time researching multiple sources to learn how and I have consolidated everything I learned into a single article below.
1. Download the photoshop template for your arcade stick from Focus Attack https://support.focusattack.com/hc/en-us/articles/207447753-Control-Panel-Templates
2. Open the template .psd in Photoshop.
3. The first thing you will see is the Instruction layer. If you want to use Focus Arcade's custom printing service read more about it here: https://support.focusattack.com/hc/en-us/sections/201695273-Artwork-Printing
In this HOWTO we will be using a local print shop so we can ignore the instructions. Delete the Instructions layer doing the following:
a) Click on the "INSTRUCTIONS" layer.
b) Click on the Lock icon above the layer which will remove the lock.
c) Now that the layer is unlocked, right click "INSTRUCTIONS" and delete the layer.
5. Once that is deleted you will see the template of your arcade stick.
6. The next step is to import the wall paper image that you want to use for your arcade stick.
a) In Photoshop Click File > Open and select and open your image.
b) The image will now be opened in a new tab. You can see in the image below there is the original template.psd file and the new wallpaper file.
c) With the wallpaper file open Click CTRL + A (to select all) and then CTRL + C (to copy the image).
d) Click on the original template.psd file tab and then click on the "ADD ARTWORK HERE" layer.
e) Click CTRL + P (to paste the image)
f) Click the Move Tool button and then drag the image to where you want to position it.
g) Next we need to stretch the image to fit. Click Edit > Free Transform. Now hold shift down and select the corner of the image and drag it to the desired size. It is important to hold shift down so it keeps the aspect ratio intact, otherwise it may look pixelated or unbalanced.
f) Unless your monitor is calibrated, it is likely the brightness on your monitor will look brighter then what will be printed at your local print shop. In Photoshop, Click Image > Adjustments > Brightness/Contrast... and increase the values. To what exactly is a matter of trial and error. Note the Razer Panthera Evo plexiglass is tinted so it will look even darker then expected.
f) Now we need to save it. Click "Save As...", change the "Save as type:" to TIFF. The default TIFF save options are fine.
7. Now you can take the TIFF file to your local print shop on a USB stick. Because of COVID many print shops are doing curb side pick up only. You can email them the file and then go there to pick up the print.
If you can find a local print shop in which you can interact with staff, that is preferred. It allows you to make corrections if needed. It is very important that you ask the print shop to print in "Actual Size". Any sort of cropping will cause misalignment. I learned this the hard way.
I recommend bringing your original arcade stick artwork and place it over the print to ensure everything lines up. My local printer initially cropped it very slightly to fit their printer and caused none of the buttons to line up. The second time I went it was still misaligned but once I showed them the original was not lining up, they realized their mistakes and made the corrections and did not charge me for the misaligned prints.
Also if the prints look too dark or too bright, you can ask them to correct it and print it again. My local print shop charges $1.25 CAD per print so it is not expensive. You can print multiple copies in case you mess up during the cutting process.
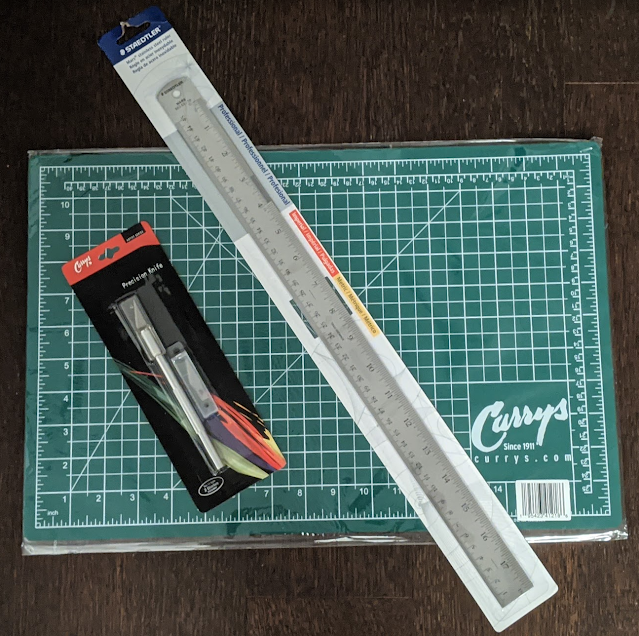
8. To cut the print I recommend purchasing a X-acto knife (roughly $3 CAD), metal ruler (roughly $3-$10 CAD depending on size) and cutting mat (roughly $10 CAD for 12"x18"). It is not required but will make your life a lot easier.
This is pretty self explanatory but I recommend for the circles cut straight lines to divide the circle into a pie. Then cut out the circle with the X-acto knife. It is easier to cut "slices" then one continuous circle.
Note: the buttons have a inner circle and an outer circle. If you purchase clear buttons, you can disassemble them and place the inner circle inside the buttons. That is outside the scope of this HOWTO. (Thanks for whoever's stick this is for the image I stole from Reddit)
9. To remove the plexiglass on the Razer Panthera Evo, remove the six screws on the bottom and the tiny screw on the top to the right of the stick. The plexiglass should then pop off. Replace the old art with the new art.
Now that you understand the basics, you can google more advanced tutorials to customize the art instead of using a simple wall paper. Have fun.
You can download the Ryu template above here (its about 100 megs):
I created a second Ryu template above which can be downloaded here (its about 100 megs):


Comments
Post a Comment